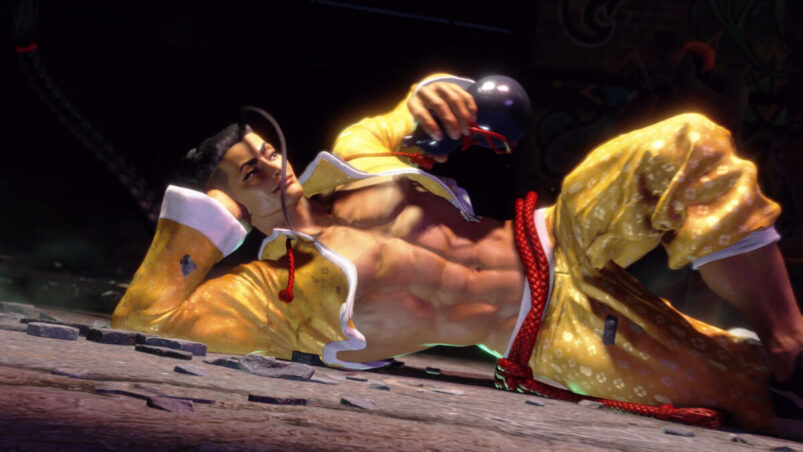
One of the best parts of a new Street Fighter game is seeing the new characters that Capcom come up with, and one of the most interesting is Jamie, a drunken fist fighter whose style and combo potential make him a force to be reckoned with. Of course, in order to be that force, you’ll need to get to grips with Jamie’s Street Fighter 6 moves and abilities.
Here’s everything you need to know about Jamie’s movelist in Street Fighter 6, including his Special Moves, Overdrives (EX Moves), Unique Moves, Super Arts and Critical Arts.
Jamie Movelist
Special Moves
The Devil Inside
(down, down + punch)
Jamie is a drunken fist master, so naturally he needs to get drunk in order to become more powerful. Performing The Devil Inside will see Jamie take a swig of his drink, and holding down the button will let him take continuous swigs. Taking a swig will leave you vulnerable, so it’s best to only do it after a hard knockdown or when you’re at full screen. Jamie starts at zero and has four levels of drunk, unlocking new moves with each one. If you’re playing Jamie, your goal is to get hammered.
Freeflow Strikes
(quarter circle forward + punch > forward + punch > forward + punch)
Jamie’s special moves feature a lot of multi-hit strikes, but Freeflow Strikes will likely be the one you’ll engage with the most. For the most part, it’s a good combo extender after a normal attack, and the move can even be cancelled into one of Jamie’s Super Arts for a significant amount of damage. Hitting two punch buttons during the first part of the move will perform an Overdrive Freeflow Strikes, which hits quite a bit harder. You don’t have to press two buttons for the second and third attack, crucially.
It’s also worth noting here that once Jamie reaches drink level four, his Freeflow Strikes are altered, as Jamie unleashes drunken fist fury on his opponent. It can be a great way of catching opponents off-guard who might try to counter attack too early because they’re used to the regular Freeflow Strikes. It’s worth keeping in mind.
Freeflow Kicks
(quarter circle forward + punch > forward + kick > forward + kick)
Freeflow Kicks is initiated in exactly the same way as Freeflow Strikes, only the follow-up attacks require the kick button instead. The same rules apply, with the Overdrive version dealing more damage. As a whole, it’s less damaging than Freeflow Strikes, but upon completion of the move, Jamie will automatically take a swig of his drink. It’s a great way of dealing damage to your opponent while also getting drunk/stronger.
Swagger Step
(quarter circle back + punch)
A lunging attack that sees Jamie striking the enemy with his palm. Jamie doesn’t have any projectiles, so Swagger Step can be a good move for closing the distance and catching the opponent unaware, especially after they’ve whiffed an attack. The Overdrive Swagger Step, performed by using two punch buttons, does more damage and creates more distance from your opponent, which could give you enough time to get a cheeky swig of your drink in.
Arrow Kick
(forward, down, down-forward + kick)
The Arrow Kick is Jamie’s anti-air move of choice. The move sees Jamie launch an opponent into the air with a big kick, before launching himself up into the air for a follow-up attack. Crucially, if you miss the first hit, Jamie will just kip up off the ground instead, but you’ll be quite vulnerable. It’s a great attack to close out your combo with, though the input might take some getting used to. Make sure to practice this input, as it’s the same as Ryu’s Shoryuken, and it’ll serve you well if you want to learn other characters.
Luminous Dive Kick
(quarter circle back + kick during a forward jump, requires drink level 1)
There’s nothing like a good divekick to keep your opponent guessing, and the Luminous Dive Kick is a pretty good one. The move changes the trajectory of Jamie’s jump entirely, and sees him hurdling foot first towards the ground. It’s a great surprise attack option, and can make approaching an opponent safer for you. The Overdrive version, performed by pressing two kick buttons, is faster and deals more damage, so if you’ve got the drive meter to spare, throw it out.
Bakkai
(quarter circle forward + kick, requires drink level 2)
Borrowing from some of the break-dancing greats, Jamie spins around on the floor when performing Bakkai, kicking his opponent in the process. It’s a high damage move that can devastate opponents who’ve left themselves wide open, making it an effective tool in Jamie’s arsenal. The Overdrive version, performed by hitting two kick buttons, adds more hits to the move and launches your opponent further away, which is great if you feel like sneaking another drink in.
Tenshin
(half circle forward to back + kick, requires drink level 3)
Tenshin is a command grab, meaning you need to be right next to your opponent in order for it to work. The throw will immobilise the opponent briefly, allowing Jamie to follow-up with a combo or Super Art. The Overdrive version of Tenshin will stun the opponent for longer, as they slowly fall over backwards. This gives you more time to hit your super move, or get that last drink in you to hit level 4.
Swagger Hermit Punch
(quarter circle back + punch > forward + punch, requires drink level 4)
A follow-up to the Swagger Step that’s only available during drink level 4, the Swagger Hermit Punch is one of Jamie’s strongest attacks outside of his Super Arts. The Swagger Hermit Punch can close even more distance, and really punish opponents who miss their attacks. The Overdrive Swagger Hermit Punch is basically the same, only it hits even harder.
Unique Moves

Tensei Kick
(down + two kick buttons)
A kick launcher, the Tensei Kick can immediately be followed up with a jump when it hits, allowing for some aerial offence. It’s also a great set-up for the Breakin’ Super Art for a decent amount of damage. An Overdrive Arrow Kick works too.
Phantom Sway
(down + heavy kick > heavy kick > punch)
A low sweeping attack, the Phantom Sway can be great for catching opponents off-guard, but using the move does leave you somewhat vulnerable if its been blocked. The final punch input is optional, but if you successfully land the attack, pressing punch will see Jamie take a swig of his drink. Just don’t take a drink in front of a blocking opponent, they’ll make you pay.
Falling Star Kick
(forward + medium kick)
A frontflip overhead kick, the Falling Star Kick is designed to punish crouching. It’s a good tool to keep in mind when it feels like you can’t open up an opponent.
Hermit’s Elbow
(back + heavy punch)
A simple elbow strike, the Hermit’s Elbow receives a small buff once you hit drink level 3, as the amount of damage it does is increased. However, the move is always useful, as it’s easy to cancel out of this move into one of Jamie’s Super Arts. Hermit’s Elbow into Getsuga Saiho can deal some hefty damage.
Senei Kick
(forward + heavy kick)
The Senei Kick works in much the same way as the Hermit’s Elbow, in that you can easily cancel the move into a Super Arts attack, and the move becomes more powerful when Jamie is plastered. The Senei Kick specifically is upgraded at drink level 4.
Bitter Strikes
(light punch > light kick > medium punch, required drink level 1)
As Jamie gets drunker, he unlocks a bunch of new combos with which to overwhelm his opponents. Bitter Strikes is a series of swift, low damage attacks that can be converted into special moves or Super Arts. It’s about as useful as combo starters get.
Full Moon Kick
(forward + medium kick > medium kick > punch, requires drink level 2)
A follow-up to the Falling Star Kick that can only be used with Jamie is halfway to sloshed, the Full Moon Kick is an easy way of following up on an overhead punish. The final punch input sees Jamie taking another drink, which is an optional input.
Intoxicated Assault
(back + heavy punch > heavy punch > heavy kick, required drink level 3)
You need to be a suitable level of drunk for this one, but the results are worth it, as this is a pretty high damage combo. The move starts with a small feint, which can catch the opponent off-guard and open them up for the ensuing onslaught. Just hope they don’t block it, as you’ll be leaving yourself wide open.
Ransui Haze
(forward + heavy kick > back + heavy kick > punch, requires drink level 4)
An intriguing move, the Ransui Haze is designed to keep your opponent guessing. After the initial two inputs, it’s left up to you when you want to press punch. Pressing it immediately leads to a big headbutt for decent damage, while waiting for a moment will see Jamie perform a series of crouching spinning backfists.
If you leave it as long as possible before pressing punch, Jamie will fall back before taking a huge chug of his drink. Considering you need to be at drink level 4 in order to use Ransui Haze, that final option might not seem useful. However, Jamie’s Super Art The Devil’s Song allows him to temporarily be at drink level 4. You can use Ransui Haze as the super wears off to then take a huge chug and get yourself closer to drink level 4.
Super Arts
Breakin’
(double quarter circle forward + kick, requires one bar of super meter)
Breakin’ is exactly what it sounds like: a series of acrobatic kicks that will mess your opponent up. Breakin’ is a brilliant combo ender, but there’s also some utility at play here. You can either let the move rock for the most damage, or hold down during the move to end it early and take a swig of your drink.
The Devil’s Song
(double quarter circle back + punch, requires two bars of super meter)
An install super, The Devil’s Song will allow you to instantly reach drink level four, at the cost of two super meter bars. The effect only lasts for about 15-20 seconds, so you will need to make the most of it. The Devil’s Song can be a good way of getting access to your best moves quicker, but if you’re gaining success from sneaking in drinks during Jamie’s other moves, it might not be the most useful Super Art to you.
Getsuga Saiho
(double quarter circle forward + punch, requires three bars of super)
Jamie’s ultimate attack, the Getsuga Saiho looks like it was lifted straight from the reels of your favourite martial arts movie. While the move itself is pretty flashy, what’s more important is the fact that you can follow up the move after its finished, as the move concludes with the opponent being launched into the air. There’s room for experimentation on how to combo after the move, but an easy follow-up if your opponent is in the corner and you’re at drink level 2 is an Overdrive Bakkai immediately after the Getsuga Saiho is over.
If you perform the Getsuga Saiho while you’re under 25% health, you’ll perform the Critical Art version, which doesn’t allow for any follow-up attacks. It does, however, do a lot more damage, so that’s nice.
READ MORE: Street Fighter 6: Confirmed Roster & Who To Expect As DLC
Some of the coverage you find on Cultured Vultures contains affiliate links, which provide us with small commissions based on purchases made from visiting our site.