Respawn’s Apex Legends is no different from all the other modern battle royale games in the fact that matches are often decided within the first minute. Landing first at a location is a massive advantage, as having a gun (any gun) certainly beats being an unarmed freebie. Landing as quickly as possible, then, is an important skill that you’ll need to learn in Apex Legends as it has its own system with its own specific quirks that you’ll need to master.
In Apex Legends, you don’t actually have a parachute/glider like you do in other titles (i.e. Fortnite and PUBG). Instead, you have a ‘jetpack’ mounted to your waist (so really it’s more of a ‘jetbelt’) that slows your descent. The idea behind this change is that you can fall in at your target destination at higher speeds for longer as the jetpack decelerates you faster (despite the glider in Fortnite basically stopping you instantly, but let’s not dwell). You’d know this as an auto-deploy feature in the other games, where reaching a minimum distance from the terrain below will deploy your glider/parachute automatically forcing you into a slow fall. In Apex Legends, the minimum distance before ‘braking’ is a lot smaller thanks to the jetpack. This essentially means that dropping from the ship to the ground is a lot shorter timewise in Apex Legends than other battle royale games, speeding up the very early game. This means you need to be decisive about where you land and be quick about it (or choose your distance accurately if you plan to jump far).
If you’re interested in high kill games with a bit more action, the usual advice is to leave the ship the moment you are able (after the ten count) and beelin to a loot rich location. Typically speaking, a third to half of the squads jumps out in this manner (though this may vary per region, it does for me), which means you’re going to have to deal with a very annoying quirk about this game: enemy collision is still present. Basically, when two (or more) groups exit the ship at the same time, they exit from the same point, but because both groups are still solid, one group will get stuck behind the other and have to ‘wait’ for them to exit. In the case of two groups this wait isn’t unbearable, but in the case of half the damn game jumping out at once, you can get put behind by a second or even more.
Put differently, you can do the absolute optimal drop strategy, but if you get ‘queued’ up behind another group, you’re already behind at an a disadvantage and this will happen more often than not. I haven’t verified what dictates the order at which groups are released from the ship, beyond just clicking faster, however that still isn’t foolproof. Lag probably also plays a significant factor. Short of using an Autohotkey script or moving closer to the server, your only option is to spam click (or hand Jumpmaster to someone with better ping) and pray.
With that out of the way, you can divide landing in Apex Legends into three general categories that have their own optimal strategy: Close, intermediate and far. I’ll cover each one and the basics of how the landing system works, coupled with some pictures (forgive my horrible paint skills) to help illustrate the strategy.
The Basics of Landing In Apex Legends
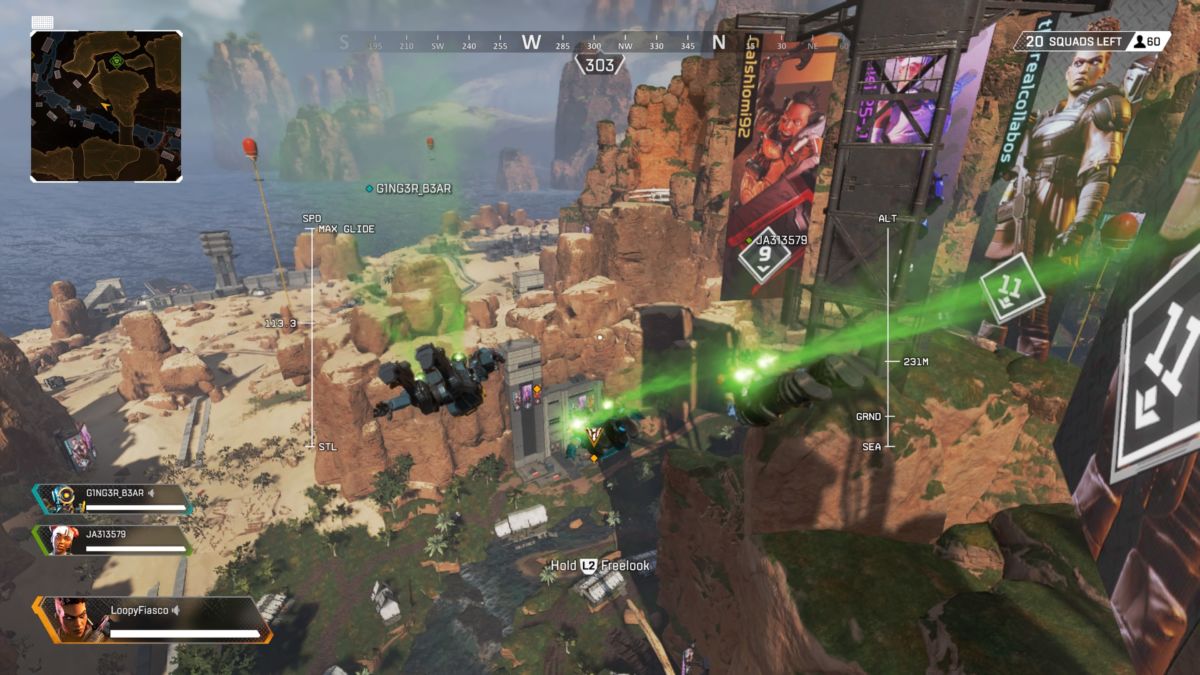
The first thing you want to do is always hold whichever input that makes you move forward (up on a joystick, W on keyboard, etc.) as this will increase your speed. Holding the input that moves you backwards (down/S) will slow you. There are no drawbacks to going faster here, so always hold your forward input.
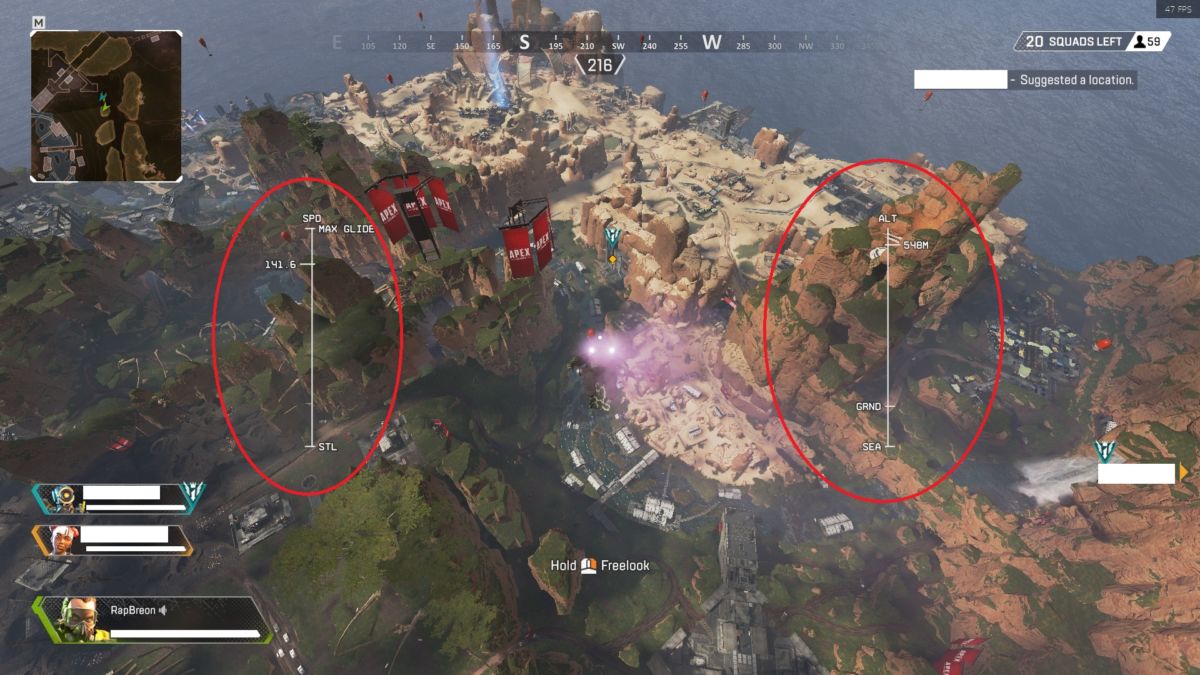
The line on the left is your glide speed and it caps out around 158. Reaching max speed is typically only possible while holding your forward input and diving straight down. You always want to be going as fast as possible without missing your intended target.
The line on the left tracks your altitude, the height of the terrain (GRND) below you and sea (SEA) level. The marker labelled GRND is variable and will move in response to the terrain below you. For example, if you fly over a mountain it’ll rise, closing the relative distance between your current altitude (relative to the sea level) and the ground below you. When you a set distance (about 50m) above the ground marker you will be forcibly slowed down as you prepare for a landing.
Because the GRND marker is relative, you may be forced into a slower fall if you pass to close to elevated terrain (i.e. GRND marker gets too close to your current altitude). You need to avoid this where possible because it will slow you down significantly to the point where you might not make your destination or arrive very late.
Finally, you should place a marker at your intended destination. Not only does this help keep your squad consolidated but is also gives you a distance in meters you are from your target, which can help you plan your approach. This marker seems to only track your horizontal distance to the target destination (i.e. a straight line from you to the target, not including your altitude), so keep that in mind.
Apex Legends Short Distance Landings
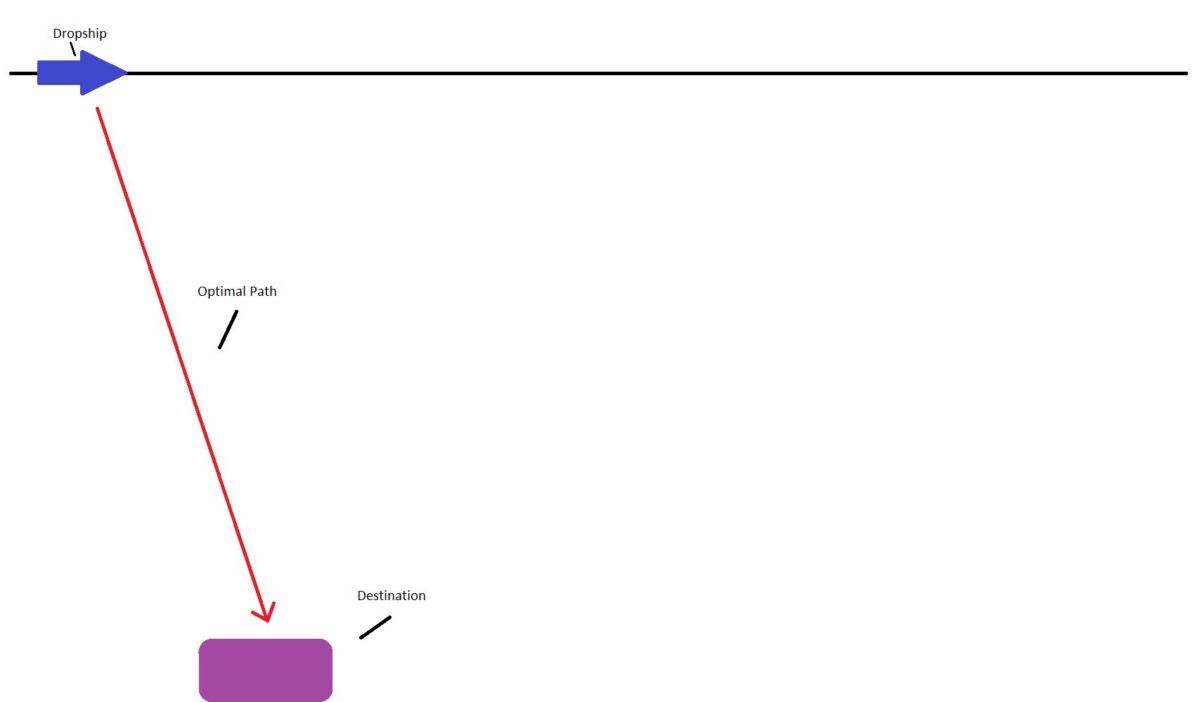
For any target directly below you, or within 100-200m of your jump location, this is the simplest strategy of the bunch. Just dive directly down at your target while holding W and pray you didn’t get body blocked by too many squads on the way out.
Apex Legends Medium Distance Landings
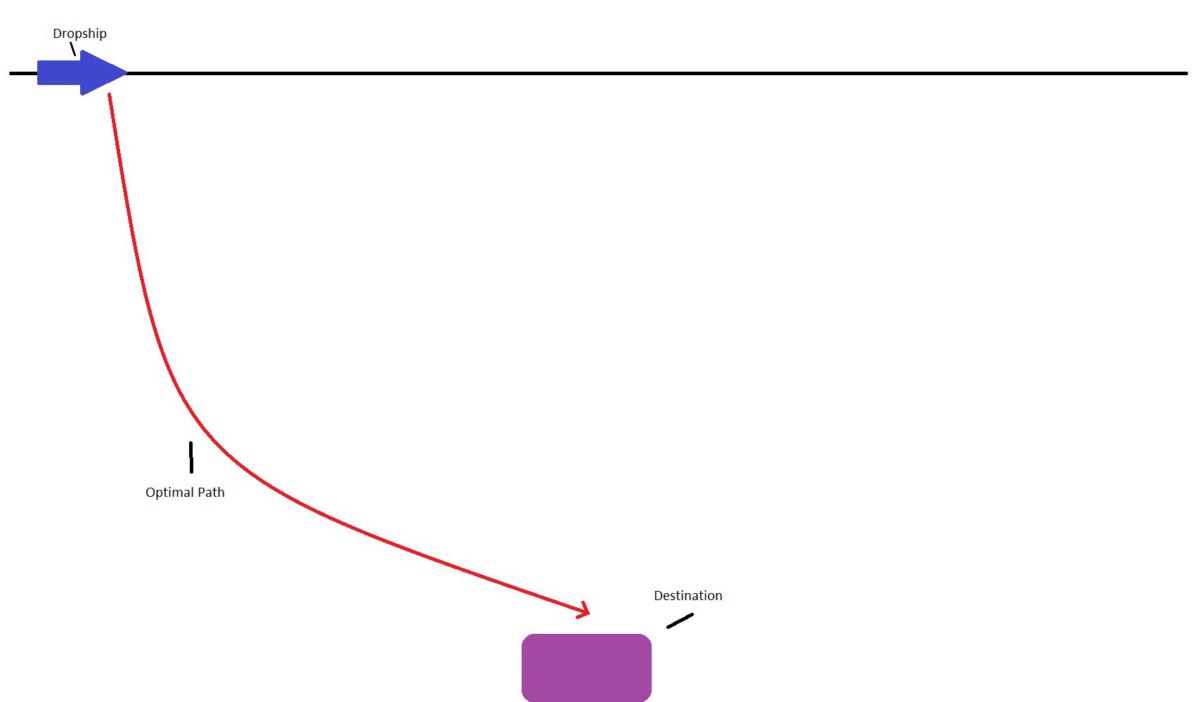
This strategy is best for landing locations about 500m from your jump location. You want to exit and dive for a while then pull up slightly as you move towards your target. This approach will form a nice curve towards the target. Just be aware that if your speed is capped out you need to pull up a bit or you’re just burning speed for less overall distance than you could otherwise gain.
Apex Legends Long Distance Landings
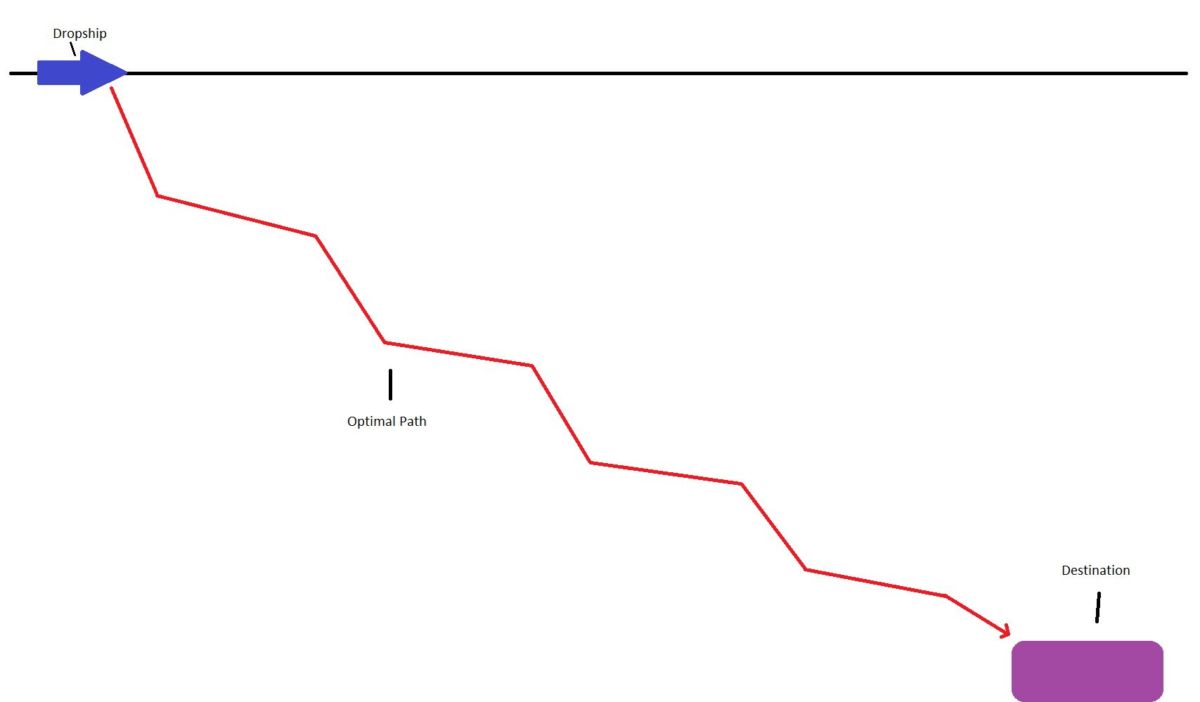
This approach is best used for landing locations 800+m away and is the least straightforward of the bunch to pull off. You want to maximise your momentum by diving down, then pulling up at around 150 and then traveling – mostly – horizontally until 135-140 before diving again. It’ll look a little bit less ‘jagged’ in practise, being a smoother curve like pattern. When done right this maximises the distance you can travel to your target location and is particularly effective at making it to distant (but lucrative) drop zones. You can eke out drops of over 1000m or more if you can get the technique down, so it’s well worth learning.
For those wanting to play a more passive game, this technique should help you land further from the dropship, which generally translates into less opponents.
For the moment, these are the best techniques we know for landing as quickly as possible. Naturally the biggest hurdle, body blocking, is still a nuisance to which nobody has really found a reliable way around yet. Hopefully Respawn will address the collision problem sometime in near the future. It doesn’t feel good to reach a drop zone second and die to a guy with a Peacekeeper for the smallest of (mostly uncontrollable) reasons.
From our Apex Legends review:
“Even the most jaded of battle royale fans will find their interest rejuvenated by Apex Legends thanks to Respawn’s attention to detail, superior gunplay, and fantastic innovations, though the loot boxes and progression system certainly need addressing.”
MORE APEX LEGENDS:
– Apex Legends Beginner’s Guide
– Apex Legends Characters From Best To Worst
– Apex Legends Tips For High Kill Games
Some of the coverage you find on Cultured Vultures contains affiliate links, which provide us with small commissions based on purchases made from visiting our site.