
Disintegration’s third level, Waggoner’s Itch, is the first real roadblock in your campaign, presenting a unique environmental hazard that’s a constant throughout the mission. The mission demands precise movement and squad command, which is why we’re here to help you deal with the dangers of The Blackout Tower.
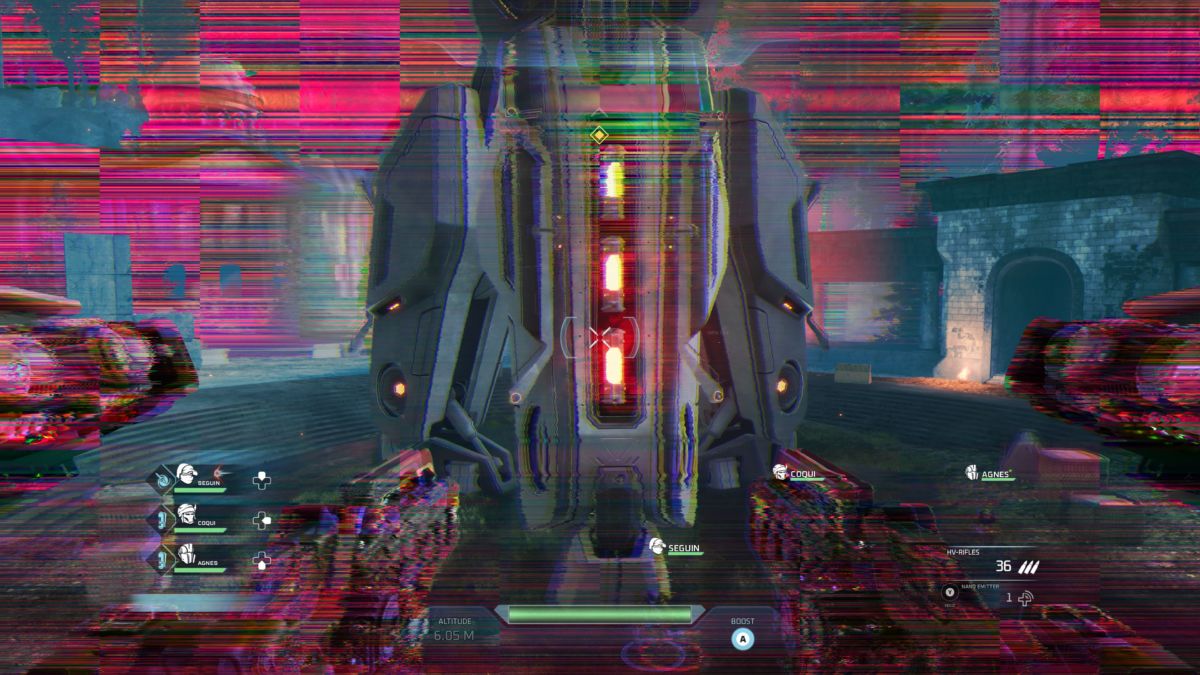
The Blackout Tower is a huge structure that sends out an EMP signal every minute, causing huge damage to both yourself and your squad, while also immobilising your team and hindering your own movement. It’s a bad time, and for the most part, the pulse can’t be dodged. There’s no hiding behind buildings here, but there is a way to avoid its effects.
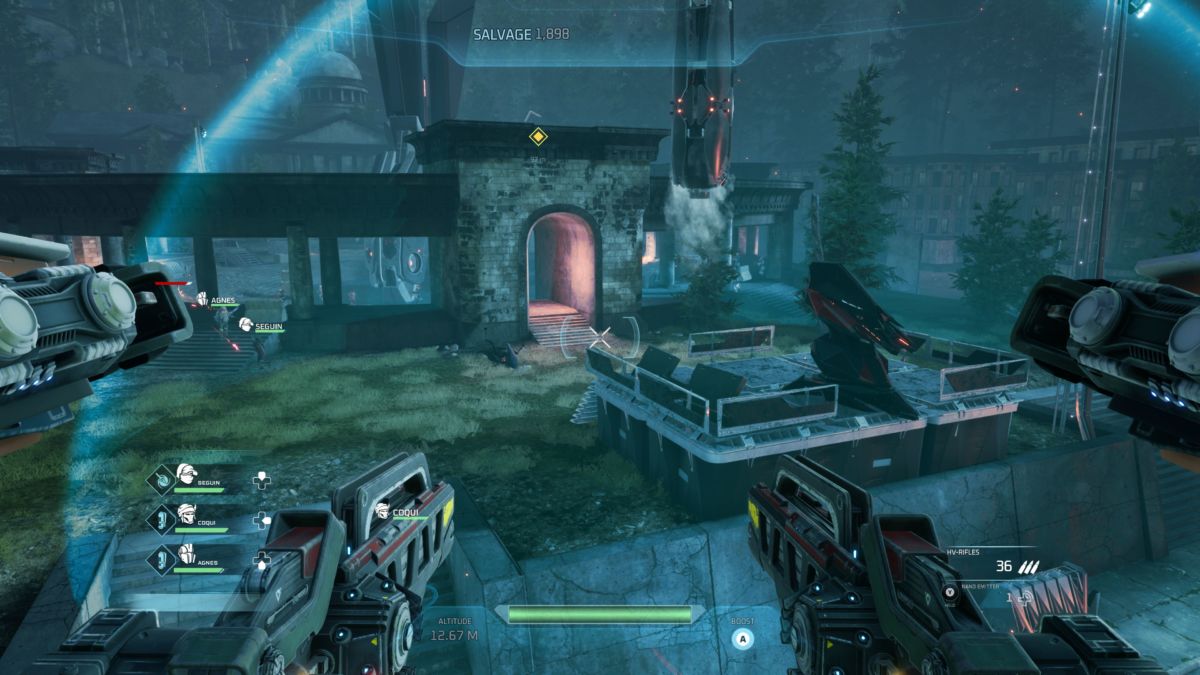
Throughout the level, there are mitigation zones that nullify the effects of the Blackout Tower. These zones are clearly signified by a big blue zone with a floating monolith looking thing in the center. Once you and your squad are inside, you’re immune to the effects of the Tower, allowing you to fight the enemies as normal.

Sounds simple enough, but there’s a challenge for completing the mission without being hit by the pulse, and the game doesn’t explain how to avoid the pulse until the second or third time it happens. It’s annoying, but that’s why we’re here to help you. The first pulse will come in as you’re approaching a ruined city, with the mitigation field at the top of the street. Immediately, rush to the zone and then deal with the surrounding minions. From there, you can take your time, travelling from zone to zone carefully.
The difficulty will then spike at the final stages of the level, when you’re tasked with bringing the Tower down. The Tower exposes its weak spots after each pulse, with nodes on the outside of the Tower’s legs. You’ll want to shoot those, then try and keep on top of the never-ending siege of Rayonne forces. Thankfully, the Tower is surrounded by a mitigation zone, so staying close means you won’t get hit by the pulse. It’s just everyone else you need to worry about.
A good tip is to fall back to the previous zone, which is where you entered the area, and take out the enemies as they come. For the most part, this avoids you becoming surrounded, and there’s even opportunities to destroy some of the nodes through a certain opening. It’s a bit of a tight shot, but it’s a great way of dealing with the fight while avoiding being swarmed.
Once six of the nodes have been destroyed, two snipers will spawn on either side of the Tower on top of the surrounding building, and these guys will mess your day up if you’re not careful. One strategy is to launch a slow field at them, before flying up to finish them off while they’re vulnerable, or try and stay underneath where they’re located so you don’t get hit. If you stay directly underneath, the tower will block the view of the other, allowing you to focus on the tower and additional enemies.
Perseverance is key in this fight, but stick with it and you’ll be able to take down the Blackout Tower and move on in Disintegration’s campaign.
Some of the coverage you find on Cultured Vultures contains affiliate links, which provide us with small commissions based on purchases made from visiting our site.